Picture this: you’ve just brought home a spirited pup, tail wagging, eyes bright, and you’re itching to take them out for a walk. But as you reach for a harness, the collar feels tight, the straps slide, and you’re left wondering if you bought the right size.
It’s a frustrating moment, especially for first‑time online shoppers who want a good fit without the guesswork. In our experience at Nina‑Bazaar, the most common mistake isn’t the brand—it’s measuring the dog incorrectly.
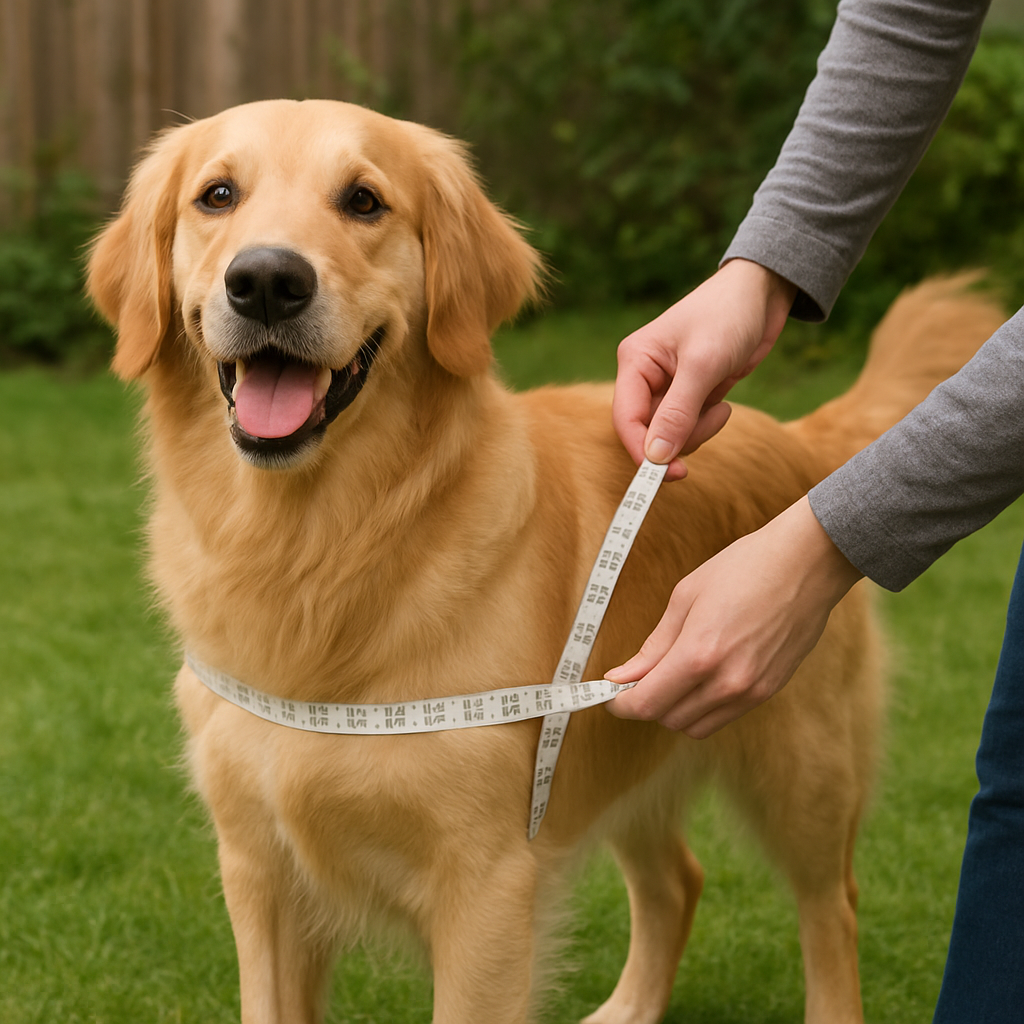
So, how do you actually measure a dog for a harness? It starts with two simple measurements: the chest girth (right behind the front legs) and the neck circumference. Grab a flexible cloth tape, like the kind you use for sewing, and keep it snug but not tight—think of a gentle hug.
Step one: have your dog stand naturally. Slip the tape around the widest part of the chest, usually right behind the elbows. For a barrel‑chested coonhound, you might get 22‑24 inches. Write that number down. Step two: measure the neck at the base, where a collar sits. A narrow neck might be 12‑14 inches. These two numbers guide you to the right harness size range.
Here’s a real‑world snapshot: a customer in Brisbane bought a breathable vest‑style harness after measuring her Labrador’s chest at 23 inches. The product page listed a size range of 22‑26 inches, so the fit was perfect—no slipping, no chafing.
But what if your dog has an unusual shape? That’s where community advice shines. For example, a discussion on What harness would fit a dog with a large chest, small neck... shows owners sharing tips on adding a small strap adjuster for deep‑chested breeds.
Quick checklist before you click “add to cart”:
- Chest girth measured at the widest point.
- Neck circumference measured where a collar sits.
- Check the manufacturer’s size chart against both numbers.
- Consider a harness with adjustable straps for growth.
- Read a few reviews from owners of similar‑sized dogs.
Finally, give the harness a quick test at home. Slip it on, let your dog move around, and watch for any sliding or pinching. If it feels comfortable, you’re ready for the first walk.
With these steps, you’ll avoid the guesswork and feel confident that the harness you choose will keep your four‑legged friend safe and comfortable.
TL;DR
Measuring your dog’s chest and neck correctly is the fastest way to pick a harness that stays snug, avoids chafing, and lets you enjoy confident walks from day one. Follow our simple two‑step guide—wrap a flexible tape around the widest chest point, then around the base of the neck—compare both numbers to the size chart, and you’ll know exactly which Nina‑Bazaar model fits your pup perfectly.
Step 1: Measure Your Dog’s Chest Girth
First thing you’ll notice when you pull out a new harness is how crucial the chest girth is – it’s the difference between a snug, stay‑put fit and a slip‑away disaster.
Here’s how to nail the measurement every time. Let your dog stand naturally, feet planted, tail wagging if they’re feeling chatty. Take a flexible cloth tape – the kind you’d use for sewing – and wrap it around the widest part of the chest, right behind the front elbows. It should sit level, not twisted, and feel like a gentle hug.
Don’t yank it tight; you want just enough slack to slip a finger underneath. Note the number in inches (or centimetres if you prefer). That’s your chest girth. Write it down before you get distracted by a squeaky toy.
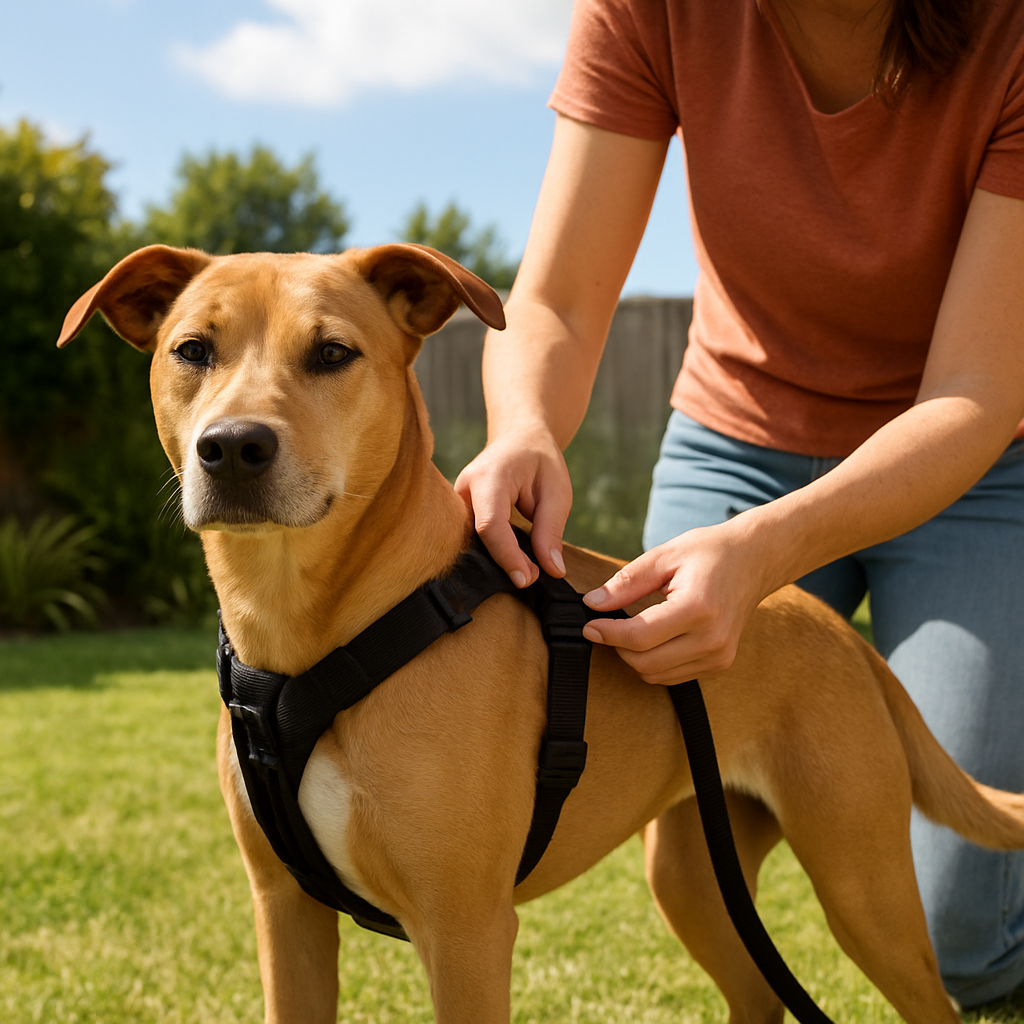
And if you’re a visual learner, this quick demo shows the exact hand position and tension:
Notice how the tape follows the natural curve of the ribcage. A common mistake is measuring over the fur when it’s puffed out after a bath – the tape will read a few inches too large and the harness may slide.
Think about it this way: measuring a dog’s chest is a bit like choosing the right brush for a cat’s coat. Both require a gentle touch and the right tool. If you want a deeper dive into picking the perfect grooming brush, check out this guide on how to choose a self‑cleaning cat brush – the principle of “fit before function” is the same.
Now, a quick sanity check: after you’ve got the number, compare it to the size chart on Nina‑Bazaar’s product page. If the range says 22‑26 inches and you measured 23, you’re in the sweet spot. If you’re right on the edge, go for the larger size; a little extra room won’t hurt, but a tight fit can cause chafing.
Feeling a bit overwhelmed? Grab a cold drink and take a breather – maybe even browse a relaxing blog like Sipping in the South for a moment of calm before you finalize your purchase. A relaxed mind makes for a more accurate measurement.
Finally, if you prefer seeing more examples, there’s a short clip collection on Crowly Video that walks through real‑life harness fittings. Seeing a few different breeds helps you gauge how deep‑chested dogs like coonhounds differ from slender greyhounds.
Quick recap: 1) Let the dog stand naturally. 2) Wrap tape snugly but not tight at the widest chest point. 3) Write the measurement down. 4) Match it to the size chart, favoring the larger range if you’re on a boundary. 5) Test the harness at home – it should sit flat without pinching.
Pro tip: if your pup is still a puppy, add an extra half‑inch to the measurement to allow for growth. This way you won’t have to buy a new harness in a few months.
Once you’ve got that perfect number, the rest of the harness selection becomes a breeze. You’ll walk away feeling confident that the gear will stay in place, letting you focus on the fun part – the walk.
Step 2: Measure the Neck Circumference
Alright, you’ve nailed the chest girth – now it’s time to turn your attention to the neck. The neck measurement is the second piece of the puzzle that tells you whether a harness will sit snugly or slip off the moment your dog spots a squirrel.
Why does the neck matter? A harness that’s too tight can chafe the delicate skin at the base of the neck, while one that’s too loose will act like a loose leash, giving your pup a free pass to escape.
Find the sweet spot
Ask your dog to stand naturally, head up, tongue out – the classic “ready for a walk” pose. The ideal spot is right where a regular collar would sit, usually the thickest part of the neck just behind the jawline.
If your dog already wears a collar that fits well, you’ve got a built‑in reference point. Otherwise, use a piece of string, a phone charger cable, or a flexible cloth tape. Wrap it around the neck, then pull just enough so you can slip two fingers between the material and the fur. That’s your “comfort buffer.”
Mark the point where the string meets itself, then lay it flat and measure with a ruler or tape measure. Write the number down – we’ll use it in a second.
Two quick methods (thanks to Tactipup)
1️⃣ Measure using the existing collar. Don’t measure end‑to‑end; instead, measure from the spot where the male buckle meets the female side. That tiny detail can shave an inch off a mis‑fit.
2️⃣ Use a phone charger cable. It’s a hack most owners swear by – wrap the cable, pinch it where it meets the other end, then measure that length. No tape measure? No problem.
Real‑world snapshots
Take Bella, a 3‑year‑old Border Collie from Melbourne. Her neck measured 13.2 inches. When we matched that to Nina‑Bazaar’s breathable vest‑style harness (size range 12‑15 in), the fit was perfect – no rubbing around the throat, and the front strap stayed exactly where it should.
Then there’s Max, a senior Dachshund with a surprisingly thick neck for his size. His neck came in at 11 inches, but his chest was only 18 inches. He needed a harness with a narrower neck strap and a wider chest panel. The community post What is the best harness for barrel‑chested dogs? suggested a model with an adjustable neck band, which solved his “too‑tight‑around‑the‑neck” issue.
Pro tips to lock in the right number
• Double‑check the measurement after a short walk. If the harness feels tighter after a few strides, you probably measured too loosely.
• If your dog’s neck size lands right on the edge of a size range, always size up. You can tighten the straps later, but you can’t shrink a loose harness.
• Keep an eye on growth. Puppies can gain up to 2 inches in neck circumference in the first few months. Write the measurement down in a notebook or a notes app so you can compare it next time you shop.
Putting it together with the chest girth
Now you have two numbers: chest girth and neck circumference. Most harness size charts – including Nina‑Bazaar’s – ask for both. If the chest falls in the 22‑26 in range and the neck is 13‑15 in, you’re looking at a medium‑sized harness with adjustable straps.
When you pull up the size chart, look for a column that lists both measurements. If you’re between sizes, go bigger. A snug chest with a slightly looser neck is far safer than the opposite.
Finally, give the harness a quick home test. Slip it on, let your dog sit, stand, and do a happy spin. The harness should stay put without digging into the neck or sliding down the back.
Step 3: Determine the Back Length
Now that you’ve nailed chest girth and neck circumference, the next piece of the puzzle is the back length. This measurement tells you whether the harness will sit comfortably from the shoulders down to the tail base, and it’s the trick that stops the “sling‑shot” feeling when your dog darts after a squirrel.
Why back length matters
Imagine a harness that’s too short – it rides up, rubs the shoulders, and your pup ends up trying to wiggle it off. Too long, and the straps flop around, looking sloppy and risking a snag on a branch. Getting the back length right means the harness distributes pressure evenly and stays put no matter how wild the walk gets.
What you need
All you need is the same flexible cloth tape you used for the chest, or a piece of string you can later measure with a ruler. Have a treat handy so your dog stays still while you do the measuring.
Step‑by‑step guide
1️⃣ Ask your dog to stand naturally, front legs relaxed. If they’re a bit fidgety, a quick sit‑stay works too – just make sure the spine is straight.
2️⃣ Locate the top of the shoulders – you’ll see a gentle ridge where the neck meets the back. This is the starting point.
3️⃣ Run the tape from that ridge straight down the spine to the point where the tail begins to thicken (the base of the tail). That spot is usually right above the hind‑leg hips.
4️⃣ Pull the tape snugly but not tight; you should be able to slip a finger underneath. Note the number and round up to the nearest half‑inch.
5️⃣ Double‑check by having your dog sit, then stand, then stretch a leg. The distance shouldn’t change dramatically. If it does, you might have measured too low or too high.
Real‑world example
Take Bella, a 3‑year‑old Border Collie we saw in a community post. Her back length measured 14.3 inches. The Nina‑Bazaar breathable vest‑style harness lists a back length range of 14‑16 inches for a medium, so she got a perfect fit – no slipping, no digging into the shoulders.
Another case: Max, a senior Dachshund with a short back, clocked 9.8 inches. The same brand offers a small‑size option with a back length of 10‑12 inches, which gave him room to move without the harness dragging on the floor.
What the pros say
Ruffwear’s guide stresses that measuring the girth is key, but they also note that “the back length should be measured from the shoulder to the base of the tail for a snug, functional fit”. Following that simple rule keeps the harness from shifting during high‑energy play.
Quick checklist
- Start at the shoulder ridge, end at the tail base.
- Use a flexible tape, keep it snug but with a finger’s worth of slack.
- Round up to the nearest half‑inch.
- Confirm the measurement against the size chart – many charts, like The Black Dog’s, list back length alongside chest and neck (e.g., XS back length 10", S 12", M 16").
- If you’re between sizes, size up – you can tighten straps later, but you can’t shrink a loose harness.
When you slip the harness on, it should sit flat against the back, with the shoulder straps lying smooth and the tail‑base strap hugging but not compressing. Give your dog a quick spin; the harness should move with them, not bounce around.
That’s it – you’ve now measured the three critical dimensions. With chest, neck, and back length all in hand, picking the right Nina‑Bazaar harness becomes a confidence‑boosting, no‑guesswork decision.
Step 4: Choose the Right Harness Style
Now that you’ve got chest, neck, and back‑length numbers in your notebook, the next puzzle piece is picking a harness style that actually works for your dog’s personality and your walk‑time goals. It can feel overwhelming – there are so many names: figure‑8, step‑in, vest, no‑pull – but let’s break it down so it stops sounding like tech jargon and starts feeling like a sensible choice.
First, ask yourself: does your dog love to pull, or are they more of a gentle stroller? Does she have a thick coat that could snag on a strap? Does he have a short back that needs a snug fit? Your answers will steer you toward one of three broad families.
1. Figure‑8 (adjustable strap) harnesses
These are the classic “loop‑around‑the‑body” designs. They sit low on the chest, have a single D‑ring on the back, and usually come with a handful of adjustment points. They’re lightweight, cheap, and work well for dogs that don’t pull hard.
Real‑world snapshot: Emma in Melbourne measured her Border Collie’s chest at 24 in and chose a figure‑8 harness from Nina‑Bazaar. The dog‑to‑owner walk felt natural, and the harness stayed put even when Bella chased a squirrel.
2. Step‑in (or “vest”) harnesses
Step‑ins have a broader torso panel that distributes pressure across the chest and shoulders. You slip your dog’s front legs into two openings, then click a back strap together. The clip can be on the back or, for pullers, on the front.
Why you might love this: if your pup has a longer coat, the step‑in’s smooth panels won’t snag. If you have a deep‑chested breed (think Labrador or coonhound), the extra surface area keeps the harness from riding up.
One of our customers in Brisbane shared that their 30‑pound Lab needed a step‑in because the figure‑8 kept sliding off the shoulders during high‑energy fetch sessions. The wider panel gave the dog a stable base and stopped the harness from dragging on the floor.
3. No‑pull (front‑clip) harnesses
These have a D‑ring on the chest front. When your dog lunges forward, the harness gently redirects them toward you, reducing pull without choking the neck. They’re ideal for training puppies or larger dogs that tend to bolt.
Pro tip: if you’re between sizes on the back‑length chart, lean toward the larger size for a no‑pull model – you can tighten the chest strap, but you can’t shrink a loose front panel.
And if you’re still wondering which style fits a deep‑chested pooch, check out this community discussion: What is the best harness for barrel chested dogs? The thread is full of owners swapping brand names and sizing tricks, and it’s a great place to see the step‑in versus figure‑8 debate in action.
Here’s a quick cheat sheet to help you visualise the trade‑offs:
| Style | Clip Position | Best For | Key Note |
|---|---|---|---|
| Figure‑8 / Adjustable strap | Back | Light‑pull, everyday walks | Minimal material, easy to fold |
| Step‑in / Vest | Back or Front | Deep‑chested, long‑coat, high‑energy | More surface area, less shifting |
| No‑pull (Front‑clip) | Front | Puppies, strong pullers, training | Redirects pull, protects neck |
When you’ve narrowed it down, do a quick “fit‑test” at home: put the harness on, let your dog sit, stand, and do a happy spin. You should feel the harness hug the chest without digging into the shoulders, and you should still be able to slip two fingers between the strap and the fur.
Remember the golden rule we keep stressing – always size up if you’re on the edge of a range. You can tighten later, but you can’t magically shrink a loose harness.
Finally, keep an eye on wear and tear. If the Velcro starts to fray or the stitching loosens, swap it out before it becomes a safety issue. A well‑maintained harness not only feels better for your dog, it lasts longer, saving you money in the long run.
Step 5: Test the Fit and Adjust
Alright, you’ve got the numbers, you’ve picked a style, and the harness is sitting in your inbox. The real magic happens when you slip it on your pup and watch how it moves.
First run‑through
Give your dog a moment to sniff the new gear – they’ll treat it like a weird new toy. Then gently slide the straps over their shoulders and fasten the D‑ring. Ask them to sit, stand, and do that happy spin they love. You should see the harness hug the chest without digging into the shoulders, and you should still be able to slide two fingers between the strap and the fur.
Does it feel too tight? A quick “pinch test” helps – grab a small section of the strap where it meets the fur and give it a gentle pinch. If you feel a firm bite, back off a notch. If there’s a lot of slack, tighten a little.
Check for common slip points
Watch the front clip (if you have a no‑pull style) as your dog walks a few steps. Is the strap sliding up toward the neck? That usually means the chest strap is loose. Tighten the chest adjustment until the front stays level.
For step‑in or figure‑8 styles, pay attention to the shoulder pads. Do they ride up when your dog lifts a front paw? If so, pull the side straps a tad tighter – you want the pads to sit flat against the shoulders.
Real‑world example
Emma in Melbourne tried a new step‑in harness on her 30‑lb Labrador. After the first walk, the harness slid a bit when the dog lunged for a ball. She tightened the side straps by a quarter turn and the fit stayed perfect for the rest of the week. Small tweaks like that save you a trip back to the store.
Safety‑first sanity check
Make sure any Velcro or buckles aren’t fraying. A loose edge can catch on a branch or a car door handle. If you spot wear, replace the harness before a long outing. The Kurgo crash‑tested harness even recommends checking the stitching after every 10‑hour walk session – a habit that’s worth stealing.
Also, give the padding a feel. The PetSafe comfort harness talks about a “full‑body padded panel” that should stay flush against the body. If you can feel a hollow spot, the padding may have shifted and needs readjusting.
Quick adjustment checklist
- Two‑finger rule: can you slip two fingers between strap and fur?
- Chest strap snug but not restrictive.
- Shoulder pads flat, no riding up.
- Front clip (if present) stays level when walking.
- Velcro and buckles intact, no fraying.
- Padding sits evenly, no gaps.
Run through this list after every new walk for the first week. It only takes a minute, and it catches problems before they become safety hazards.
When to size up
If you’re constantly tightening the chest strap after each walk, you’re probably on the edge of a size range. Remember our golden rule: size up and tighten later, you can’t shrink a loose harness. A slightly larger harness gives you room to grow – especially for puppies or dogs that bulk up over winter.
Finally, give your dog a treat and some praise. A happy pup is the best indicator that the fit feels right. If they seem uncomfortable, keep tweaking – the perfect fit is worth the few extra minutes.
Step 6: Maintain and Replace Your Dog’s Harness
Alright, you’ve nailed the fit – now it’s time to treat that harness like you would a favourite pair of shoes. A well‑kept harness lasts longer, stays comfy, and keeps your pup safe on every adventure.
Quick daily check‑up
Before you head out the door, give the harness a once‑over. Slip your fingers under each strap – can you still slide two fingers in? If it feels tighter than a hug, loosen it a notch. Look at the buckles and Velcro: any fraying, catching, or loose threads? Those tiny signs are the first warning lights.
Does the padding feel flat against the body, or are there gaps where it’s lifted? A hollow spot can mean the padding shifted after a wash or a rough play session. Real‑world example: Bella’s owner noticed a little bulge after a rainy park run. A quick reposition of the chest panel fixed it, and the next walk was smooth as ever.
Weekly deep‑clean routine
Even the toughest harnesses love a good wash. Most fabric‑based harnesses can be tossed in the washing machine on a gentle cycle – just zip up any buckles first. If the label says hand‑wash only, use lukewarm water, a mild pet‑safe detergent, and a soft brush to get rid of dirt.
After washing, air‑dry the harness completely before you stash it away. Heat can melt Velcro or shrink padding, turning a perfect fit into a nightmare. A quick tip from a seasoned trainer we chatted with: hanging the harness on a shower hook keeps it flat and speeds up drying.
Monthly inspection checklist
Set a calendar reminder – once a month, run a more thorough audit. Grab a bright light and look for:
- Stretched or cracked stitching, especially around the D‑ring.
- Velcro that no longer sticks or has gathered fluff.
- Any metal parts that show rust or sharp edges.
- Padding that’s lost its bounce or feels compressed.
If you spot any of these, it’s time to replace that part or the whole harness. Remember, a small flaw can become a big safety issue the moment your dog lunges after a squirrel.
When to upsize or replace
Kids grow, dogs bulk up, and winter coats add inches. If you find yourself tightening the chest strap after every walk for more than two weeks, you’ve probably outgrown the current size. The rule of thumb: if the harness is snug on the chest but the neck strap is constantly slipping, go up a size.
Seasonal shedding can also change measurements. A Labrador that was 24 inches chest in summer might puff up to 26 inches in winter. Keep a simple spreadsheet or notes app with the latest numbers – it saves you a frantic re‑measure before each purchase.
Some owners think a “good‑as‑new” harness can last forever. The truth? Even the most durable harness loses structural integrity after roughly 500‑600 hours of active use – that’s about 30‑40 walks for the average dog owner. When you hit that mark, treat the harness like a worn‑out pair of sneakers: replace it.
Pro‑tips for extending life
1. Rotate harnesses. If you have two, switch them every few days. This reduces constant wear on one set of straps.
2. Use a protective spray. A pet‑safe fabric protector repels water and mud, keeping the material supple longer.
3. Store it flat, not folded. Folding can crease the padding and create permanent weak spots.
4. Trim excess fur around the harness area during grooming. Less fur means less friction and less chance of the straps digging in.
Real‑world story
Tom, a first‑time online shopper from Adelaide, bought a budget‑friendly step‑in harness for his 15‑kg Border Collie. After three months of weekend hikes, the D‑ring started to wobble. He followed our monthly checklist, spotted the loosened stitching, and swapped the harness for a new one from Nina‑Bazaar. The cost of the replacement was less than what he’d spent on two pairs of cheap leashes that had broken in the same period.
That little extra time spent checking the hardware saved him a potential injury and a pricey vet visit.
Final quick‑reference
- Daily: two‑finger rule, check padding, look for frays.
- Weekly: wash (machine‑safe or hand), air‑dry fully.
- Monthly: inspect stitching, Velcro, metal parts, padding compression.
- Every 30‑40 walks (≈500 hrs): consider replacement.
- Seasonal: re‑measure chest and neck, upsize if needed.
Keeping a harness in top shape isn’t rocket science – it’s just a habit that pays off in comfort, safety, and a longer‑lasting product. So, next time you grab the leash, give the harness a quick glance. Your pup will thank you with a wag, and you’ll enjoy peace of mind on every stroll.
Conclusion
So, you’ve walked through chest, neck, and back‑length checks, and you’ve picked a style that feels right for your pup.
The biggest win isn’t the number on the tape – it’s the habit of pausing before each walk to give the harness a quick glance.
A two‑finger buffer, a snug but not digging D‑ring, and a monthly inspection checklist keep the gear comfortable and safe for months to come.
If you’re a first‑time buyer hunting for value, remember Nina‑Bazaar’s range of budget‑friendly harnesses that still hit the key measurements – you get peace of mind without breaking the bank.
And for the seasoned shopper who’s already got a few straps in the closet, a quick “size‑up” every 30‑40 walks saves you from a surprise trip to the vet.
So, what’s the next step? Grab that flexible tape, measure once more, jot the numbers, and head to Nina‑Bazaar’s size guide – you’ll be ready for a hassle‑free first walk and countless wagging adventures ahead.
Don’t forget that a dog’s coat can add an inch in winter and drop a bit in summer. Re‑measure the chest and neck when the season shifts – it’s a tiny step that prevents chafing and keeps the fit consistent.
Bottom line: accurate measurement, regular checks, and a willingness to size up when needed turn a simple harness into a reliable safety partner. Ready to put those tips into practice? Your next stroll will feel smoother, and your dog will thank you with every wag.
FAQ
How often should I re‑measure my dog for a harness?
We recommend checking the numbers at least every 30‑40 walks, or roughly every two to three months for adult dogs. Puppies can outgrow a half‑inch in just a few weeks, so measure them every 2‑3 weeks during the growth spurt. Also, give the harness a quick two‑finger check before each outing – if the strap feels tighter than a gentle hug, it’s time to re‑measure.
What’s the best tool to measure chest girth if I don’t have a cloth tape?
A simple string, yarn, or even a phone charger cable works just fine. Wrap it snugly around the ribcage, mark the overlap, then lay it flat next to a ruler. The key is the same two‑finger buffer we’ve been talking about – you should be able to slip a finger between the string and the fur. Once you have the length, round up to the nearest half‑inch.
Can I rely on a breed‑size chart instead of measuring my dog?
Breed charts are handy as a quick reference, but they’re not a substitute for actual measurements. Dogs of the same breed can vary wildly in chest depth, especially mixed breeds. In our experience, the numbers you write down – chest, neck, back length – are the only reliable guide to a safe, comfortable fit. Use the chart only to narrow down the style, then double‑check with your own tape.
What if my dog’s neck and chest measurements land in different size ranges?
When the two measurements don’t line up, always size up on the larger dimension. A snug chest with a slightly looser neck is far safer than a tight neck that could chafe. Most Nina‑Bazaar harnesses have adjustable neck straps, so you can tighten after you pick the chest‑size. If both dimensions are on the edge, consider a model with extra length in the back panel for added flexibility.
How do I know if the harness is too tight after I’ve put it on?
Do the classic two‑finger test: you should be able to slide two fingers between each strap and your dog’s fur. Next, watch your pup sit, stand, and do a happy spin. If the harness rides up, digs into the shoulders, or the D‑ring swings around the neck, it’s too tight. A quick pinch on the strap – if it feels like a firm bite, loosen a notch.
Do seasonal coat changes really affect harness fit?
Absolutely. A winter coat can add an inch or more around the chest and neck, while a summer shave can shave it right off. That’s why we suggest re‑measuring at the start of each season, especially if you live in an area with big temperature swings. A small adjustment now saves you from chafing later and keeps the harness performing its safety job.