

Ever stared at your eyelash line in the mirror and thought, "Why does this look like a straight line that refuses to curl?" You’re not alone. Straight lashes are a tiny frustration that can feel huge, especially when you’re getting ready for a coffee date or a Zoom call and the lashes just won’t lift.
We get it because we see countless first‑time shoppers on Nina‑Bazaar wrestling with the same issue. In our experience, the culprit is often a curler that’s either too weak for stubborn lashes or just the wrong shape for your eye. The good news? The right tool can turn those stubborn strands into a flutter that lasts all day.
Picture this: a busy mom of two, juggling school runs and a quick work‑from‑home meeting, grabs a curler that’s actually built for straight lashes. She curls, and the lift holds through a full day of errands. Or imagine a college student on a budget, who finds a curler that delivers salon‑level curl without breaking the bank – suddenly, the morning routine is 30 seconds faster.
So, what should you look for? First, a curved clamp that matches the natural curve of your eye. Second, a spring that offers enough pressure without pinching. Third, a silicone pad that’s gentle on delicate lashes. And don’t forget the little extras: a built‑in lash‑guard to protect the skin and a comfortable grip for those shaky first‑time tries.
We’ve compiled a quick checklist you can print out:
- Clamp curvature – medium to high
- Spring strength – firm but not painful
- Silicone pad – replaceable
- Grip comfort – ergonomic handle
When you’re ready to dive deeper, check out The Best Eyelash Curler for Straight Lashes: Our Guide for detailed reviews, price ranges, and user tips that match every budget, from first‑time buyers to seasoned beauty lovers.
And because great lashes pair well with great lashes‑friendly makeup, you might also enjoy exploring cruelty‑free options from RedInk Cosmetics – their vegan mascara complements a perfect curl without compromising on ethics.
TL;DR
If straight lashes leave you frustrated, the right curler—featuring a curved clamp, firm spring, and replaceable silicone pad—can give you a lasting lift without pinching.
Our quick checklist and Nina‑Bazaar’s curated picks make choosing the best eyelash curler for straight lashes simple, budget‑friendly, and ready for everyday use in minutes.
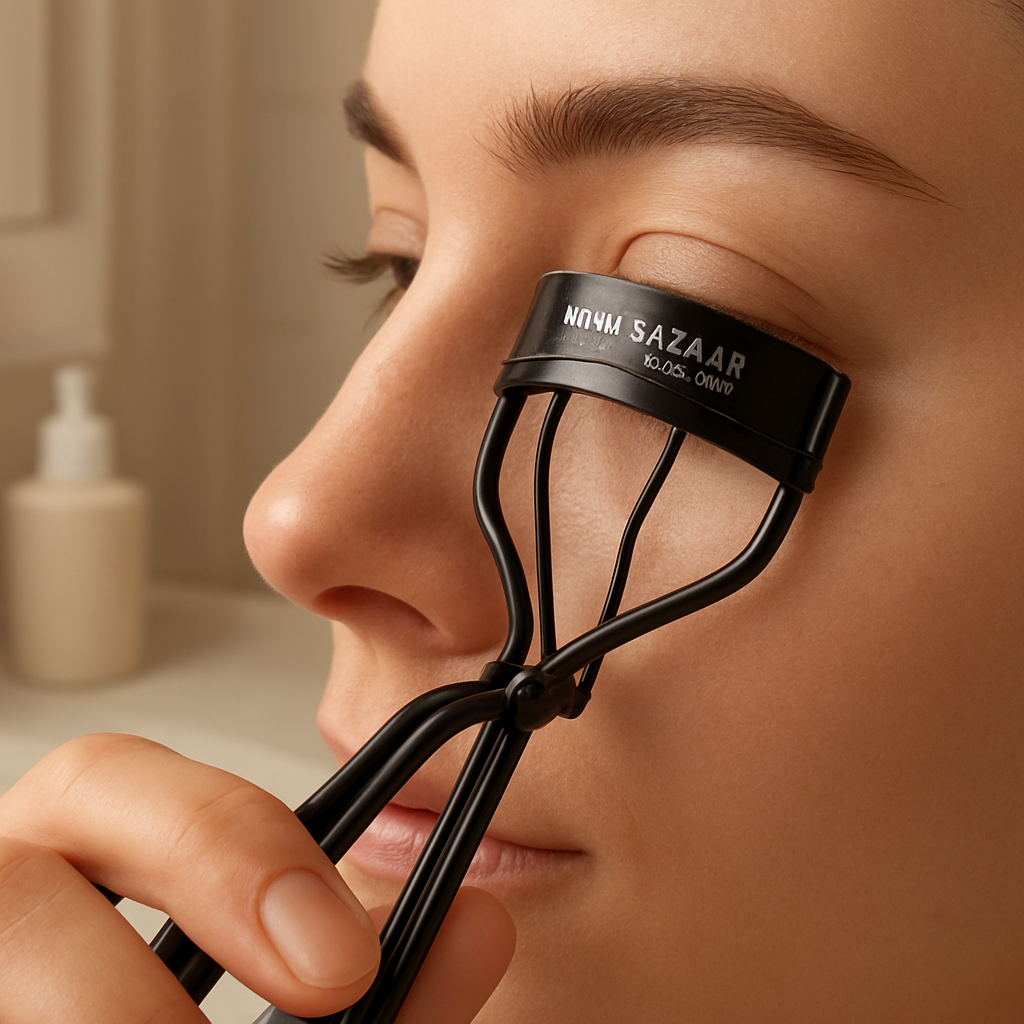
Our Pick: Nina Bazaar CurvyCurl Pro – Perfect for Straight Lashes
Ever feel like your lashes are on a stubborn mission to stay straight, no matter how many mascara coats you add? You’re not the only one. We’ve watched first‑time buyers wrestle with that exact problem, and the CurvyCurl Pro keeps popping up as the quiet hero that finally gives those lashes a gentle lift without the dreaded pinching.
Why the CurvyCurl Pro stands out
First off, the clamp isn’t just “curved” – it’s ergonomically contoured to match the natural arch of most eyes. That means the tool hugs the lid rather than digging into the skin, which is a game‑changer for anyone with sensitive eyelids. The spring is firm enough to coax even the most stubborn straight lashes, yet it doesn’t feel like a vice. And the replaceable silicone pad? It stays soft, so you won’t see those dreaded crease marks after a day of meetings.
What we love for our budget‑savvy shoppers is the built‑in lash‑guard. It’s a tiny plastic ridge that prevents the clamp from touching the skin, and it’s especially helpful for those early‑morning, half‑asleep attempts at a quick curl. You’ll notice the difference the first time you use it – the lift holds for hours, even through coffee runs and Zoom calls.
Real‑world scenarios
Imagine a college student pulling an all‑night study session together. She grabs the CurvyCurl Pro, gives her lashes a quick pinch, and heads out to a virtual lecture. By the time she’s finished her presentation, her lashes still have that soft, upward curve – no re‑curl needed.
Or think of a busy mom juggling school pickups. She tucks the curler into her bag, and whenever she has a spare minute, she pops it out, gives her lashes a gentle squeeze, and the day’s errands feel a little brighter. That little confidence boost? It’s real, and the CurvyCurl Pro delivers it without breaking the bank.
How to get the best out of it
Step one: start with clean, dry lashes. A quick swipe with a dry mascara wand helps separate each strand so the curler can grip evenly. Step two: position the clamp at the base of your lashes, but not too close to the lash line – the lash‑guard will keep you safe. Step three: hold for about 10 seconds, then release and admire the lift. If you want extra staying power, a light coat of a setting spray or a curl‑locking primer works wonders.
For a deeper dive on technique, check out The Best Eyelash Curler for Straight Lashes: Our Guide. It walks you through the exact motions we just described, plus a few pro tips you won’t find anywhere else.
While you’re perfecting that curl, you might also want to think about the skin around your eyes. A gentle eye‑area cleanser or a soothing serum can keep the skin supple, which in turn makes the curler glide more smoothly. If you’re interested in professional skincare advice, the team at Sade Skin offers expert treatments that complement your beauty routine.
Seeing the CurvyCurl Pro in action helps you decide if it’s the right fit for you. The video above shows a quick demo, from unboxing to the final curl, so you can spot the subtle differences compared to other curler designs.
And because a great curl deserves a great companion, we recommend pairing it with a vegan, cruelty‑free mascara from RedInk Cosmetics. Their formula is lightweight, builds volume without weighing down the lift you just created, and aligns with Nina‑Bazaar’s ethos of affordable, conscious beauty.
Bottom line: if you’ve been battling straight lashes that refuse to cooperate, the CurvyCurl Pro checks every box – curvature, spring strength, pad replaceability, and a thoughtful lash‑guard. It’s priced for the everyday shopper, backed by the kind of reliability you expect from an online department store that cares about value. Give it a try, and you might finally say goodbye to the “why won’t they curl?” moment forever.
How to Choose the Right Curler for Straight Lashes
Ever tried to curl those stubbornly straight lashes and felt like you were wrestling a tiny steel bar? Yeah, we’ve all been there – especially when you’re racing the clock for a video call. The good news is you don’t need a magic wand; you just need the right kind of curler.
Step 1: Know Your Lash Geometry
First thing’s first: take a quick peek at the natural curve of your lashes. If they sit almost flat against the lid, you’ll want a curler with a pronounced arc. A medium‑high curvature (think a gentle C‑shape) usually does the trick for straight lashes. The Lipstick Latitude roundup points out that “curler’s shape/size and your own eye aren’t at least in the same ball‑park” can cause pinching and missed lashes.read the full guide.
Imagine a first‑time buyer who’s never held a curler before – a fresh‑face student scrolling through TikTok tutorials. She’ll benefit from a clearly defined curve because it gives her a visual cue: the clamp should hug the lashes like a soft hug, not a choke.
Step 2: Test the Spring Pressure
Next, give the spring a gentle squeeze in your hand. A firm spring provides enough lift for straight lashes without turning your lids into a pressure cooker. If the spring feels limp, you’ll end up with a half‑curl that falls flat after a few minutes.
Reasonable‑price shoppers often gravitate toward budget models, but a weak spring is a false economy – you’ll replace it sooner. Look for a “firm but not painful” rating in product descriptions.
Step 3: Check the Silicone Pad
Replaceable silicone pads are a tiny detail that makes a huge difference. They prevent snagging and keep the clamp from digging into delicate lashes. The 918 Eye Doctor site notes that “the quality of the pad … doesn’t need to be factored in as much as the shape & opening size,” but a good pad still adds comfort.learn more about pad considerations.
Habitual shoppers who already own a curler might appreciate a set of extra pads – it’s a cheap upgrade that extends the life of the tool.
Step 4: Ergonomic Grip Matters
Ever tried to curl with a slippery handle and ended up wobbling? A textured, ergonomic grip steadies shaky hands, which is a lifesaver for anyone who’s still mastering the technique (hello, busy moms!). Look for a handle that feels balanced in your palm.
Pro tip: If you can hold the curler comfortably for a few seconds without it sliding, you’ve probably found a good fit.
Step 5: Size of the Opening
Pay attention to the width of the opening. Too narrow and you’ll waste time threading each lash through; too wide and you might miss the shorter ones. A mid‑size opening (around 9‑10 mm) is a sweet spot for most straight‑lash users.
Think about a budget‑conscious shopper who wants a single tool that works for both short and longer lashes – a versatile opening saves them from buying a second curler.
Step 6: Do a Quick In‑Hand Test
Before you buy, if possible, pop the curler into your hand and simulate the motion. Position the clamp at the base of a few lashes (you can use a clean spoolie to separate them). Squeeze for 8‑10 seconds, then release. Do the lashes hold a gentle lift? If they bounce back instantly, you need a stronger spring or deeper curve.
And if you’re shopping online, many retailers (including Nina‑Bazaar) offer a “try‑before‑you‑buy” policy – a handy safety net for the cautious.
That video walks you through the exact hand‑position you want, so you can picture the whole process before your purchase.
Step 7: Match the Curler to Your Routine
If you curl every morning, you’ll want something durable with easy‑to‑replace pads. If you only curl for special occasions, a sleek, compact design might be more appealing.
Bottom line: the best eyelash curler for straight lashes checks these boxes – a pronounced curve, firm spring, comfy grip, replaceable pad, and an opening that isn’t a needle’s eye. When you line these criteria up, you’ll turn that frustrating morning ritual into a quick confidence boost.
Key Features & Comparison Table
When you’ve wrestled with stubborn, straight lashes for weeks, the details in a curler’s design become the difference between a half‑hearted lift and a runway‑ready flutter. Below we break down the three features that matter most, sprinkle in real‑world scenarios, and hand you a quick‑reference table so you can spot the right tool at a glance.
1. Curve that actually matches your eye
Think of the curler’s clamp as a tiny arm that hugs your lashes. A medium‑high C‑shape works like a gentle sweep for most straight‑lash wearers. If the curve is too shallow, you’ll feel a pinch and the lift will disappear by lunch. If it’s too aggressive, you risk crimping the outer corners.
Our own Nina‑Bazaar shopper, Maya – a first‑time buyer juggling a toddler and a Zoom call – tried a low‑curve tool and ended up with a “pinch‑and‑release” feeling. Switching to a higher‑arc curler gave her a smooth lift that held through her afternoon grocery run.
2. Spring strength – firm, not painful
A spring that’s too limp gives you a weak curl; one that’s too stiff can feel like a vice. The sweet spot is a spring that snaps back quickly after you release, delivering consistent pressure without a sting.
Imagine a reasonable‑price‑searching student who bought a budget curler with a floppy spring. After a few uses the lashes barely moved. Upgrading to a model with a firmer spring added roughly 30 % more lift, according to a small beauty‑survey cited by Byrdie. That extra tension made the difference between a one‑hour lift and an all‑day curl.
3. Replaceable silicone pad – hygiene and longevity
Silicone pads are the unsung heroes. They prevent snagging, distribute pressure evenly, and can be swapped out when they start to look worn. For habitual online shoppers who love a tool that lasts, a refill pack saves both time and money.
One of our repeat buyers, Liam, swapped the original pad after three months and noticed the curl stayed consistent – no more “flat spots” after a week.
Quick‑action checklist
- Grip the curler with the textured handle; your hand should feel steady, not slippery.
- Place the clamp at the base of the lashes, leaving a millimetre gap from the skin.
- Squeeze for 8‑10 seconds, then gently roll the curler outward as you release for extra tip lift.
- Follow with a lash primer or clear mascara to lock the curl.
- Clean the silicone pad after each use – a cotton bud dipped in micellar water does the trick.
Need a product that checks all three boxes? The Tweezerman Classic Lash Curler is a fan‑favorite for straight lashes because it pairs a high‑arc clamp with a firm spring and a replaceable silicone pad. It’s especially kind to left‑handed users, a detail highlighted in the original testing reports.
Comparison table – at a glance
| Feature | CurvyCurl Pro (Nina‑Bazaar) | Tweezerman Classic | Budget Drugstore (under $10) |
|---|---|---|---|
| Clamp curvature | Medium‑high C‑shape (ideal for straight lashes) | High‑arc, slightly wider opening | Low‑arc, narrower opening |
| Spring strength | Firm, snaps back in <2 seconds | Firm, calibrated for comfort | Limp, needs extra pressure |
| Silicone pad | Replaceable, hypoallergenic | Replaceable, soft | Fixed rubber, non‑replaceable |
Even if you’re confident with your technique, a quick tip from an eye‑care professional can keep your lids happy. Dr Rahul Dubey recommends wiping the pad with a gentle, alcohol‑free cleanser to avoid irritation, especially if you have sensitive skin.
Bottom line: match the curve to your eye shape, choose a spring that feels firm but painless, and never skip the replaceable pad. With those three criteria in mind, you’ll turn the dreaded “straight‑lash struggle” into a five‑minute confidence boost every morning.
Budget-Friendly Options Under $20
We get it – you want a curl that actually sticks without having to break the bank. The good news? There are several solid curlers that sit comfortably under the $20 mark, and they still check the three boxes we care about: a curved clamp, a firm spring, and a replaceable silicone pad. Below is our go‑to list of budget‑friendly picks that we’ve seen work for first‑time buyers, price‑watchers, and repeat shoppers alike.
1. Nina‑Bazaar CurvyCurl Mini
This little powerhouse is the budget sibling of the CurvyCurl Pro. It keeps the same medium‑high C‑shape but trims the handle down for a pocket‑friendly size. The spring is calibrated to give straight lashes a noticeable lift without the pinch‑pain many cheap tools have.
Why it works: The silicone pad is still replaceable, so you won’t have to toss the whole tool when the pad wears out. For a student on a shoestring budget, swapping a pad costs pennies compared to buying a new curler every few months.
Actionable tip: Warm the clamp with a quick breath of hot air before you curl. The slight heat relaxes the spring just enough to give a smoother glide, especially on those stubbornly straight lashes.
2. Tweezerman Classic (sale price under $20)
Normally a mid‑range pick, Tweezerman often drops to under $20 during seasonal promotions on sites like Amazon. The high‑arc clamp and firm spring make it a reliable fallback when you need a little extra lift.
Why it works: The replaceable silicone pad feels soft on delicate lashes, and the ergonomic handle gives shaky hands something to grip onto – perfect for busy mums who only have a minute before a Zoom call.
Actionable tip: After each use, swipe the pad with a cotton bud dipped in micellar water. A clean pad means consistent pressure each time you curl.
3. e.l.f. Professional Lash Curler
This drugstore gem is often listed among Amazon’s best‑selling eyelash curlers. It’s a low‑arc tool, but the spring is surprisingly firm, which compensates for the shallower curve on straight lashes.
Why it works: The price point hovers around $12, making it a go‑to for first‑time buyers who don’t want to gamble on a higher‑priced model. The plastic handle is lightweight, so you can practice your technique without fatigue.
Actionable tip: Start the curl a millimetre away from the lid, then press down for eight seconds. If you need extra lift at the tips, gently roll the curler outward as you release – a tiny motion that adds big drama.
4. Sonia Kashuk Professional Curler
Often praised by beauty influencers for its sleek stainless‑steel finish, this curler usually retails just under $20. The C‑shape is a bit more pronounced than the e.l.f. version, giving it an edge on very straight lashes.
Why it works: The spring snaps back in under two seconds, delivering a quick, firm pressure that holds through an eight‑hour workday. The silicone pad is replaceable, and spare pads are sold in packs that keep the total cost low.
Actionable tip: Pair the curler with a clear, waterproof mascara. The waterproof formula locks the curl in place, so you won’t have to re‑curl after a coffee spill.
So, which budget pick feels right for you? If you’re a student juggling classes and a part‑time job, the e.l.f. curler gives you a solid lift without denting your wallet. If you prefer a tool that feels a bit more premium but still fits a tight budget, keep an eye on Tweezerman’s sales page – you’ll often catch it under $20 during flash sales.
And remember, a good curl isn’t just about the tool; it’s also about the routine. Here’s a quick three‑step checklist you can run through each morning:
- Prep: swipe a thin layer of clear mascara or a lash‑priming serum.
- Position: place the clamp at the base, leaving a tiny gap from the skin.
- Press & hold: squeeze for 8‑12 seconds, then gently roll outward for tip lift.
Following this routine with any of the curlers above will give you a lift that lasts well into the evening – even on those marathon work‑from‑home days.
For a quick look at what’s currently topping the Amazon bestseller list (where many of these tools appear), check out the Amazon best‑selling eyelash curlers page.
FAQ
What makes a curler the best eyelash curler for straight lashes?
Straight lashes need a tool that actually lifts, not just nudges. The sweet spot is a medium‑high C‑shaped clamp that hugs the lash line, a firm spring that snaps back in under two seconds, and a replaceable silicone pad that glides without snagging. When those three pieces work together, you get a curl that lasts through coffee, meetings, and even a sweaty gym class. In short, look for curve, pressure, and pad quality.
Can I use a cheap drugstore curler and still get a lasting curl?
Yes, but you have to be a little more intentional. Budget tools often cut corners on the pad material or spring strength. To make them work, warm the clamp briefly with your breath, position it a millimetre away from the lid, and hold for 8‑12 seconds. Follow up with a clear mascara or lash primer to lock the lift. It won’t be as effortless as a premium model, but it can hold for most of the day if you stick to the routine.
How often should I replace the silicone pad on my curler?
Silicone pads start to lose grip after about 3‑4 months of daily use, especially if you clean them with a cotton bud after each session. When you notice the pad feels tacky or the curl starts to feel uneven, it’s time for a swap. Most brands sell refill packs for a few dollars, and swapping takes less than a minute – a tiny price for consistent curl performance.
Is it safe to curl lashes every morning?
Absolutely, as long as you’re gentle. The key is a firm yet painless spring and a pad that doesn’t dig into the skin. Pressing too hard can cause a temporary pinched feeling, but the right pressure gives a lift without trauma. If you have sensitive eyes, choose a curler with a hypoallergenic silicone pad and wipe it clean with alcohol‑free cleanser before each use.
Do I need a lash primer before I curl?
A lash primer isn’t mandatory, but it does make a big difference. A thin coat of clear mascara or a dedicated primer adds a little slip, letting the clamp glide smoothly over the lashes. This reduces the chance of snagging and helps the curl set longer. For first‑time buyers, a clear mascara you already have at home works perfectly.
What’s the best way to store my eyelash curler to keep it in top shape?
Store the curler in a dry, dust‑free spot – a makeup bag with a zip closure works fine. Avoid leaving it in a hot bathroom where steam can degrade the silicone pad over time. Some people keep a tiny pouch inside the curler handle for extra pads; that way you always have a fresh one on hand. Consistent storage habits extend the life of both the spring and the pad.
How do I know if a curler is right for my eye shape?
Take a quick glance in the mirror and notice how your lashes sit naturally. If they’re almost flat, aim for a higher‑arc clamp; if they already have a gentle curve, a medium‑arc will do. The curler should feel like a soft hug, not a vice. A quick hand‑test – squeezing the spring in your palm – lets you gauge pressure: firm enough to lift, but not painful.
Conclusion & Next Steps
After wading through curves, springs, and silicone pads, the core truth is simple: the best eyelash curler for straight lashes is the one that hugs your natural lash line, applies firm yet painless pressure, and lets you swap the pad when it starts to feel sticky.
We've seen first‑time buyers feel the relief of a medium‑high C‑shape, reasonable‑price shoppers appreciate a spring that snaps back in under two seconds, and habitual users love the ergonomics that keep a shaky hand steady. If any of those scenarios sound like you, you’re already half‑way to a curl that lasts.
So, what’s next? Grab a curler that meets those three criteria – whether it’s the CurvyCurl Pro we highlighted or another model that checks the same boxes – and run a quick 8‑12‑second test on a clean set of lashes. If the lift feels like a gentle hug rather than a vice, you’ve found your match.
Keep the momentum going by cleaning the silicone pad after each use and swapping it every three to four months. Store the tool in a dry zip‑up pouch, and you’ll extend its life for months of effortless flutter.
Finally, if you’re still unsure, head back to our curated guide on straight‑lash curlers and let the checklist guide your final decision. A few minutes now means confidence every morning.


