

Let’s be real: every time you drag a tiny pup—say a Chihuahua or a Dachshund—out the door and the leash yanks you like a runaway kite, you’re probably wondering where that pull is coming from and why your dog feels like they’re sprinting on a treadmill. You’ve got a small dog, a short leash, and an entire neighborhood to conquer, but that tug‑tug can make even the most patient owners feel like they’re fighting a losing battle.
It’s not just about the leash—it’s about the harness. A properly fitting no‑pull harness changes the game by redirecting the pull toward the body instead of the neck, turning a frantic pull into a gentle, controlled walk. When you think of a harness, imagine a snug, padded chest plate that keeps the tension from hurting your dog’s delicate neck or jaw.
In our experience, the secret to a smooth walk starts with a harness that actually fits the size and shape of your little friend. What is a No Pull Dog Harness? A Practical Guide for Everyday Dog Owners breaks down how to measure, adjust, and choose the right model so you’re not buying a one‑size‑fits‑all that ends up causing discomfort or frustration.
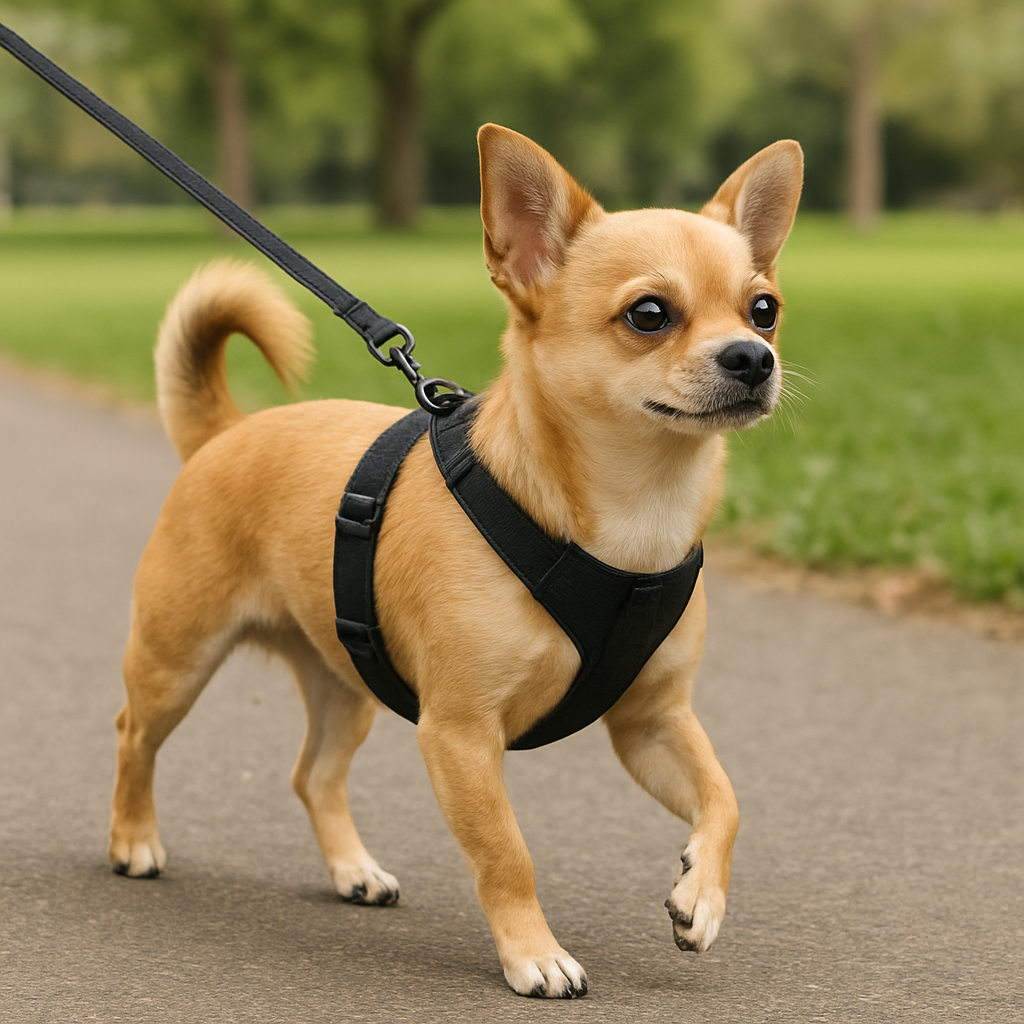
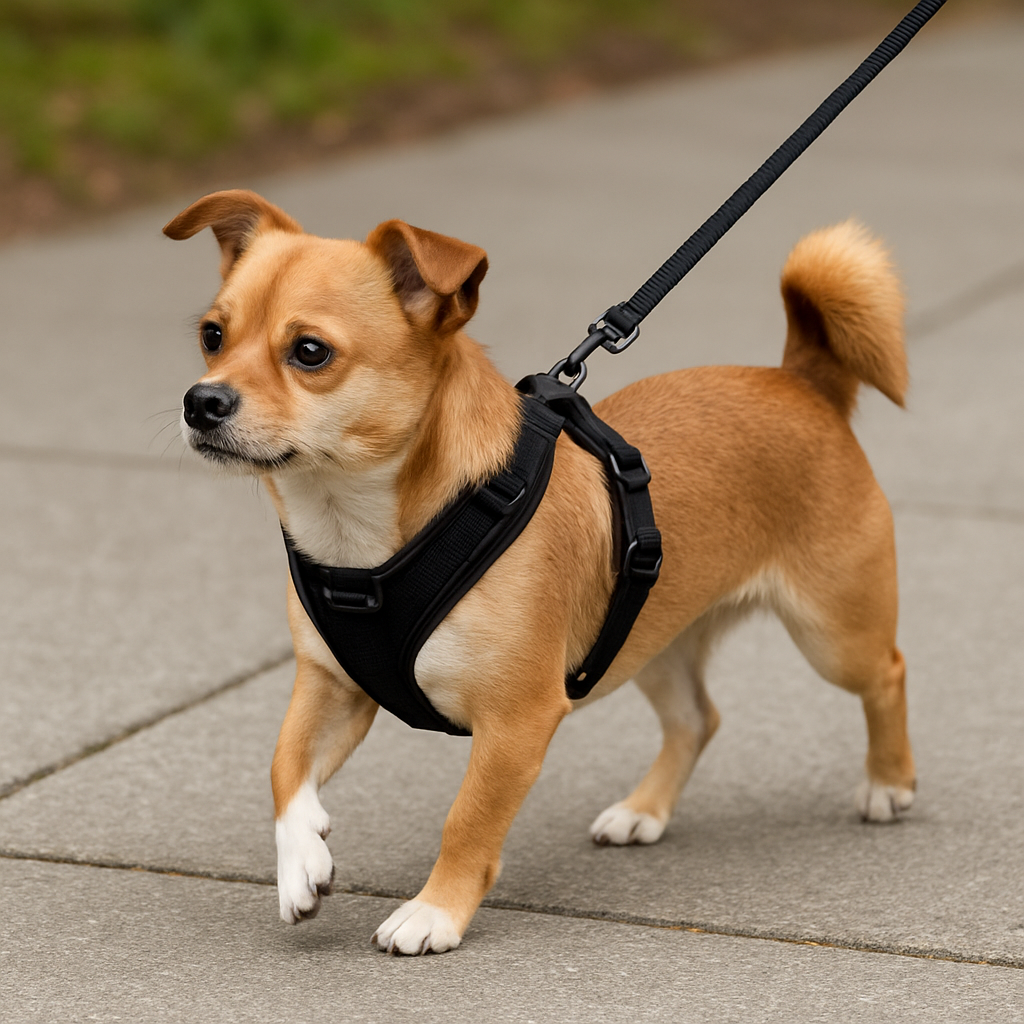
Picture this: a bright‑red harness with a padded chest strap that slides under a 12‑inch‑wide dog, a small adjustable loop, and a quick‑release buckle. You fit it, adjust the straps so the chest plate sits snug but not tight, and suddenly that tug turns into a gentle nudge that encourages your pup to walk beside you. This simple change has turned frantic morning walks into peaceful strolls for countless pet owners.
Ready to get the harness you need? Here’s a quick checklist you can do in just a few minutes:
- Measure the dog’s chest circumference just behind the front legs.
- Check the width of the harness straps; they should be broad enough to distribute pressure.
- Test the buckles and fastenings—nothing should feel loose or overly tight.
- Watch for signs of chafing or discomfort after a 10‑minute walk.
If any of those steps feel off, swap the harness or adjust the size.
And if you’re already loving the idea of caring for your small dog with the right gear, you might also want to explore how to keep your entire pet household happy. 10 Best Cat Scratching Post Wall Mounted Options for Every Home offers great ideas for cat lovers who want to keep their furry friends entertained and scratching where they belong.
TL;DR
In a world where a tiny tug can feel like a storm, the right no‑pull harness for small dogs turns frantic walks into calm strolls. We’ve gathered the best picks, sizing tips, and real‑world hacks so you pick a fit that keeps your pup happy, leash relaxed, and mornings smooth.
Step 1: Understand Your Dog’s Size and Shape
First off, let’s talk about why size matters when picking a no‑pull harness for small dogs.
Imagine your Chihuahua standing on a tiny stand‑up desk. That’s your dog’s chest width.
So, what should you look for?
Measure the chest circumference. Place a soft tape just behind the front legs, where the harness will sit. Wrap it around the widest part of the chest. Keep the tape level, not tight—your dog should have a finger’s width to move.
Next, check the strap width. A good no‑pull harness will have straps that are at least 1.5‑2 inches wide. Narrow straps concentrate pressure and can leave marks on a little frame.
Now, test the buckles. Fasten the harness so it feels snug but you can slip a finger through. If it’s too tight, you’ll feel tension even when the dog sits still.
Do you have a pup that’s more like a terrier than a terrier? Small breeds can be surprisingly robust. A harness that works for a Chihuahua may not feel the same on a Miniature Schnauzer. That’s why Nina‑Bazaar news recommends checking the sizing charts on the product page before you buy.
Here’s a quick checklist you can run in your head:
- Chest measurement < 12 inches? Great—look for a harness sized for < 12”.
- Straps > 1.5 inches? ✔️
- Quick‑release buckle? ✔️
- No chafing after 10 minutes? ✔️
When you’re picking a harness, keep in mind the shape of your dog’s body.
A narrow, sleek dog like a Jack Russell needs a harness that hugs close to the spine to keep the pull from pulling sideways.
A dog with a stockier chest like a Corgi may need a wider chest plate.
Want more gear ideas for pet owners who love both dogs and cats? You might also check out these cat scratching posts—they’re great for multi‑pet households.
Now, let’s jump into a quick video that shows how to properly fasten a no‑pull harness. Watch it and try it out on your pup later.
After you’ve tried the video, you’ll notice how the harness stays in place without tugging on the dog’s neck.
By measuring properly, checking strap width, and testing buckles, you’ll avoid a tight fit that leads to frustration for both you and your dog. It’s a simple step that saves a lot of time down the road.
Feeling ready? Pick a harness that matches your dog’s measurements and start your next walk with confidence.
Once the harness feels right, do a quick “pull test.” Gently tug on the leash while your dog stands still. If the harness stays put and the dog’s neck stays slack, you’re good. If it slides or the dog flinches, loosen the straps a bit. This small tweak can make the difference between a calm stroll and a frantic sprint and keep your paws from getting sore today.
Before you go, if you’re curious about finding creators who share dog‑friendly travel tips, you can browse the OnlyFans creator directory for content that blends pet adventures with lifestyle inspiration.
Step 2: What Features Make a Good No Pull Harness for Small Dogs?
Okay, you’ve got the right size, but is the harness actually going to keep your pup from pulling? Let’s dig into the details that make a no‑pull harness work for tiny terriers, Chihuahuas, and other small breeds.
1️⃣ The Front‑Clip Magic
Think of the front clip as the lever that turns pulling into a gentle nudge. When the leash connects to the chest plate, a tug pulls the harness sideways instead of straight back, nudging your dog toward you. That little shift is the secret to loose‑leash walking. If you can’t feel the difference in a quick test walk, the harness probably isn’t front‑clip.
Want proof? Check out PetMD’s guide on how no‑pull harnesses work for a deeper dive into the mechanics.
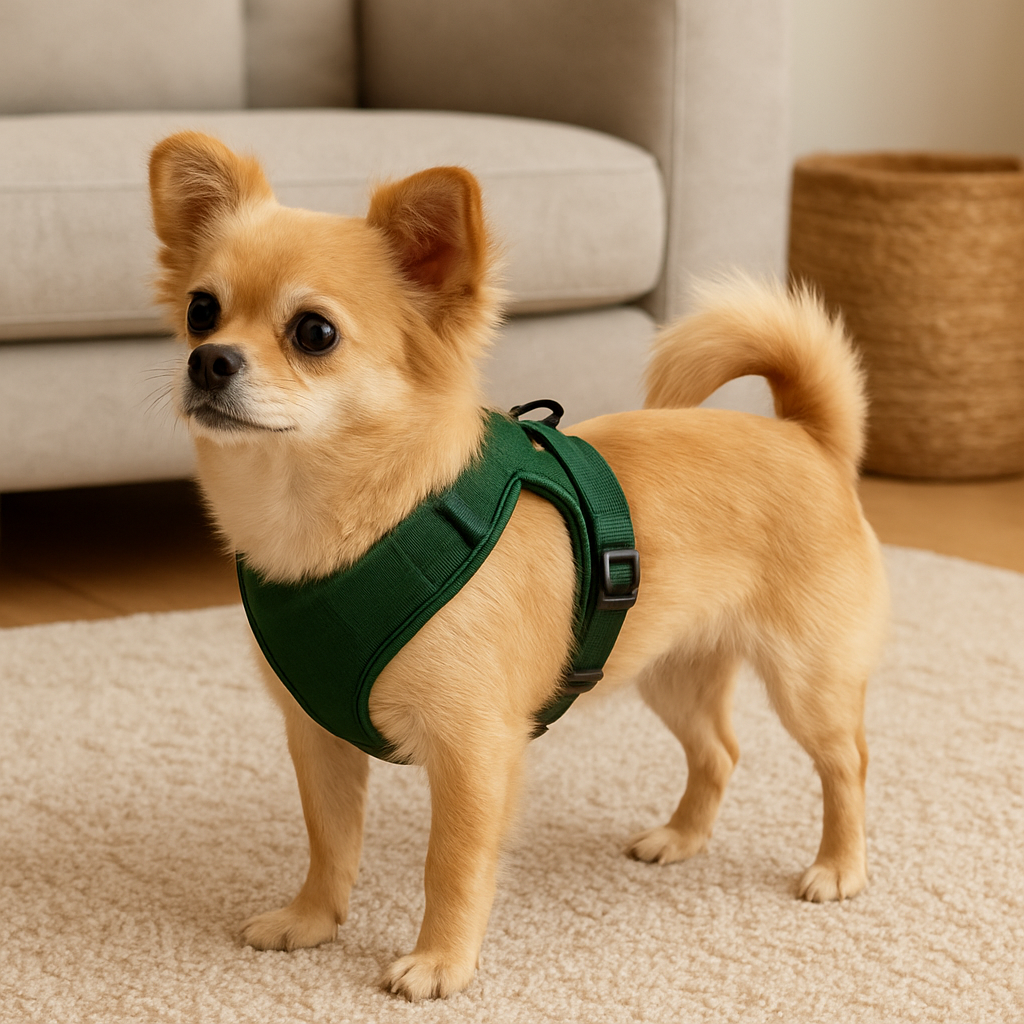
2️⃣ Wide, Padded Straps
Thin webbing is great for a sleek look but not for a pulling pup. Wide straps—ideally 1.5–2 inches—spread pressure across the chest and belly, preventing chafing and heat spots. A padded layer of neoprene or foam adds a buffer so the harness feels like a soft blanket rather than a squeeze. Picture your dog’s fur shiver with excitement, not with a burning sensation.
When you’re shopping, look for a “comfort pad” label. That’s usually a sign the manufacturer cares about a gentle fit.
3️⃣ Multiple Adjustment Points
Small dogs grow fast, and a harness that was perfect last month might feel too tight or too loose today. Good harnesses give you at least three adjustment zones: chest, belly, and neck. You can fine‑tune each so the harness stays in place but never pinches.
Here’s a quick mental checklist:
- Chest strap: should let two fingers slide under
- Belly strap: same rule, but keep it a bit looser to avoid pulling back on the chest
- Neck loop: snug enough that the dog can lift its head without strain
4️⃣ Dual Leash Rings
Some harnesses feature a second ring at the back, giving you a choice: front ring for tighter control, back ring for a more relaxed feel. The ability to switch rings lets you adapt to the environment—tight in crowds, loose on an open trail. Think of it as having a dimmer switch for leash tension.
In practice, a back ring works well when you want your pup to walk beside you without the constant tug that a front clip alone might create.
5️⃣ Quick‑Release Buckles and Easy On/Off
Every time you tie the leash, the harness should feel like a breeze, not a chore. Quick‑release buckles let you slip the harness on in seconds, and they’re essential in an emergency when you need to remove it fast. A smooth, plastic clasp is often more durable than a heavy metal latch that can snag.
Also, test the buckle before you step out. If you can’t open it with one hand while holding your dog, you’ll be stuck.
6️⃣ No‑Head‑Cramps: Avoiding the Neck
Pulling can push a dog’s head straight back, putting pressure on the trachea. A good no‑pull harness redirects that force to the chest and shoulders, sparing the neck. That’s why many experts advise against collars for small, prone‑to‑pull dogs. If you do use a collar, make sure the harness fits tightly enough that the collar stays off the neck.
7️⃣ Material Matters: Breathable vs. Heavy
Small dogs often have thinner fur and more sensitive skin. A breathable mesh or cotton‑based harness keeps them cool, while a heavy polyester can trap heat. If your pup is prone to overheating, choose a lightweight material that still offers the durability of nylon webbing.
Remember, the harness is a piece of gear you’ll wear every day, so it should feel like a second skin.
8️⃣ Test Walk & Observe
After you’ve fitted the harness, take a 5‑minute stroll and watch for red spots, scratches, or that “sliding” feeling that means the harness is too loose. If the dog leans to one side or keeps tugging, tighten the chest strap slightly and try again. Repeating this test a few times ensures the harness is snug without being restrictive.
When you’re happy, reward your pup with a treat. Positive reinforcement makes the harness feel like a privilege, not a punishment.
Real‑World Example: The Tiny Terrier
Take Luna, a 5‑lb French‑Bunny mix that used to pull so hard you could hear the leash squeak. We fitted her with a harness that had a front‑clip, wide padded straps, and dual rings. Within two walks, Luna was walking on the left side, her ears relaxed, and the leash hanging loose. The only adjustment was tightening the belly strap by half an inch so she didn’t lean forward.
Luna’s owner told us that she now enjoys the walk as a bonding time, not a tug‑tug battle.
What to Do Next?
Now that you know the key features, it’s time to shop or check your current harness. Look for front‑clip, wide padded straps, multiple adjustment points, dual rings, quick‑release buckles, and breathable material. If your harness lacks one of these, consider swapping it for a model that matches the list. The goal? A harness that feels like a hug, not a choke.
Ready to find the perfect fit? Browse GoPetFriendly’s roundup of no‑pull harnesses for models that meet the criteria we just covered. Happy walking!
Step 3: How to Measure and Adjust the Harness Correctly
We’ve already chosen the right kind of harness and checked the size. Now it’s time for the hands‑on part: making sure the fit feels like a hug, not a choke. This is where the magic of the no‑pull harness truly shows its worth.
First, grab a soft measuring tape or a piece of string and a ruler. You’ll be measuring around the widest part of your pup’s chest, right behind the front legs. Don’t forget to do it on a calm, relaxed dog—tension can make the tape sit tighter than it should.
Next, slide the harness over your dog’s shoulders and chest. The front clip should sit snug but not squeeze. If the strap moves when you walk, tighten it just a bit. This is where the how to measure a dog for a harness guide from Nina‑Bazaar’s own page can be a handy reference.
Once the harness is on, let’s talk adjustment. Start with the belly strap—adjust until you can slip two fingers between the strap and the dog’s belly. Too tight and you’ll see redness; too loose and the harness can slide forward.
The chest strap is the real game‑changer. Tighten until the front clip stays in place when you give a gentle tug. If the strap feels like a belt, you’re fine. If it’s a loose rope, tighten a couple of clicks.
Now, pull the leash gently and walk a short stretch in your living room or hallway. Watch for any chafing spots, the harness shifting, or the dog leaning too far forward. If you see a red line where the strap meets the skin after ten minutes, loosen it a notch or move the strap slightly.
Do you notice your dog pulling more on the front ring than the back? If so, switch to the back ring for a smoother walk. Many owners find the back ring less intimidating for the pup, especially on a first day with a no‑pull harness.
Once the harness feels snug but not tight, give your dog a treat and a quick walk outside. This real‑world test will reveal any last‑minute adjustments needed. If the harness drifts to one side, readjust the chest strap to center it.
Remember, a good harness stays in place but still allows freedom of movement. If your dog can’t lift its head or lift its legs, the harness is probably too tight in some area.
Here’s a quick checklist you can keep on your phone for future reference:
- Measure chest width accurately.
- Ensure two‑finger clearance on belly strap.
- Chest strap keeps front clip in place.
- No chafing after 10‑minute walk.
- Back ring works for calm walks; front ring for tug reduction.
Need more detail on how to fine‑tune the fit? Take a look at the FanScanner guide for pet owners—they’ve got a quick section on harness adjustments that’s surprisingly useful.
To help you decide which adjustment points matter most, check out this handy comparison table:
| Adjustment Point | What to Look For | Typical Action |
|---|---|---|
| Belly Strap | Two‑finger clearance | Loosen if red marks appear |
| Chest Strap | Front clip stays in place | Tighten if it slides forward |
| Back Ring vs Front Ring | Dog’s stance and pulling | Switch ring based on behavior |
With these steps, you’re ready to keep the harness snug and your dog happy. Keep a log of any changes you make—this helps when your pup grows or when you try a new harness model. And remember: a well‑fitted harness turns a tug‑tug battle into a calm, enjoyable walk for both of you.
Step 4: Common Mistakes to Avoid When Using a No Pull Harness
We’ve already dialed in the fit, so it’s time to talk about the little slip‑ups that can turn a smooth walk into a tug‑tug saga.
Think of the harness as a safety net for your pup. If you let it slip, you’re basically tossing a net with holes in it.
Check out this helpful video for a quick harness demo: watch the walkthrough.
1️⃣ Forgetting to Check the Front‑Clip Position
That front‑clip is the magic that redirects pulling. If it’s too high or the chest strap is too loose, the leash will simply pull the dog straight back instead of nudging them sideways.
When you first put the harness on, give the leash a gentle tug and watch where the front clip lands. Does it stay on the chest plate or drift to the belly?
If it slides forward, tighten the chest strap until the clip is firmly seated. A loose front clip is a recipe for frustration on both ends.
2️⃣ Skipping the Two‑Finger Rule on the Belly Strap
Even the best harness can feel like a chokehold if the belly strap is too tight. The two‑finger rule isn’t just a suggestion; it’s a safety check.
Place two fingers between the strap and your dog’s belly. If you can only fit one finger, pull back a half inch or two clicks. Read more about harness adjustment on TheLille Bjorn article.
Remember, a tight belly strap forces the harness to shift forward, which can pull the dog’s head straight back and cause neck strain.
3️⃣ Ignoring Body Language During a Test Walk
Most owners only test fit by walking a few minutes inside. But subtle signs like a red line on the skin or the dog leaning too far forward are red flags.
Watch for a “sliding” sensation when your pup moves. If the harness drifts to one side, it’s unevenly loaded and needs re‑adjustment.
Give the dog a treat at the end of the walk. If they still look uneasy or resist, pull back and readjust.
4️⃣ Overlooking the Difference Between Front‑Ring and Back‑Ring Use
Some harnesses have two leash attachment points. It’s easy to default to the front ring and keep tugging, but the back ring can be a game changer.
When a dog pulls a lot in crowds, switch to the front ring for tighter control. On open trails, the back ring offers a relaxed walk and less tension on the leash.
Try both rings for a few minutes and see which feels more natural to you and your dog.
5️⃣ Neglecting to Re‑Check Fit After Each Purchase
New harnesses can feel snug initially but will change as you attach different leashes or as your dog grows.
Every time you get a new harness or a new leash, test the fit in motion. A harness that was perfect last month might be too tight today.
Keep a simple log: size, strap adjustments, and any observations. It’s a quick habit that saves frustration later.
6️⃣ Relying Solely on the Harness for Training
It’s tempting to think a no‑pull harness is a quick fix, but it doesn’t teach the dog to walk politely.
Use the harness as a tool, not a crutch. Combine it with positive reinforcement—treats, praise, and short walks to build good habits.
In the long run, training will keep pulling in check even when you’re not wearing the harness.
7️⃣ Forgetting to Clean the Harness Regularly
Dog sweat, dirt, and debris can build up, especially on the chest plate where the harness sits.
Wipe the harness after every walk with a damp cloth. This prevents skin irritation and keeps the fabric in good shape.
Regular cleaning also lets you spot early signs of wear or damage.
8️⃣ Forgetting to Check the Harness in Different Environments
What works in your living room doesn’t always work on a busy sidewalk or in a park.
Take a short walk in a new setting and observe how the harness behaves. Does it stay centered? Are there chafing spots? Adjust as needed.
Adapting the fit to the environment keeps your pup comfortable everywhere.
So, what’s the takeaway? A no‑pull harness is only as good as the attention you give it.
Stay vigilant, keep your dog’s comfort first, and pair the gear with consistent training. The result? A calm, happy walk and a happy dog who knows the right way to follow.
Step 5: Transitioning Your Dog to a No Pull Harness
So you’ve got the right harness and the right fit—congrats! Now it’s time to let your pup actually learn how to walk without the tug‑tug drama. Think of this as the bridge between “gear ready” and “calm stroll.”
Start Slow: The “Trial Walk”
Put the harness on, attach the leash, and go for a 5‑minute walk in a quiet spot—your hallway, a quiet side street, or a backyard. Watch for that tiny sign that the harness is doing its job: the chest plate stays in place, and the dog keeps its head up. If you notice any chafing or the harness slipping forward, stop, readjust, and try again. The goal is a short, stress‑free run where you’re the only thing pulling.
Use the “Red Light, Green Light” Cue
When the dog starts to pull, shout “stop” or say “easy” in a calm tone. Reward the calm position with a treat. This simple cue turns the harness into a communication tool instead of just a restraint. Repeat a few times and you’ll see the dog’s attention shift back to you.
Layer the Training: Gradual Exposure
Once the dog can walk 5 minutes without pulling in a low‑distraction area, step up the challenge. Move to a park lane, a busier sidewalk, or a trail where other dogs are on leashes. Keep the sessions short—10 minutes max—and reward every calm step. The incremental exposure helps the pup generalize the behavior across settings.
Check the “Front‑Clip” Position Regularly
The front clip is the heart of a no‑pull harness. If it’s too high or the chest strap is loose, the dog will pull straight back instead of being nudged to your side. Every time you re‑attach the leash, give the harness a quick check: the clip should sit snugly on the chest plate. If it’s sliding, tighten the chest strap just a click or two.
Make It a Routine: Short, Consistent Sessions
Consistency beats intensity. Five 5‑minute walks a day are more effective than one 30‑minute walk. Treat the harness as a daily accessory, not a “one‑off” tool. Over time, the dog will start expecting the harness and will naturally walk beside you.
Watch for Body Language Clues
If the dog leans forward, digs its paws in, or shows a red line along the harness, it’s a sign it’s too tight or uncomfortable. Stop, readjust, and try again. A well‑fitted harness should feel like a gentle hug, not a squeeze.
Use Positive Reinforcement as the Glue
Every time the dog stays in the correct position, toss a treat or give a quick pat. Over time, the harness becomes associated with good things, and the dog will look forward to the walk instead of the tug‑fight.
When Things Get Tough
Don’t panic if the dog resists. Step back, let it sniff the harness, and re‑introduce it in a relaxed manner. Remember, the harness is a tool, not a punishment. Keep the training light and fun.
Check the Market for the Right Gear (Optional)
If you’re looking for more advanced harnesses, the iHeartDogs guide offers a comparison of top models and features that help with transition. For training techniques, the Canada Pooch training tips are also worth a look.
Remember: the transition is a process. Keep it light, keep it short, and keep the positive vibes flowing. In the end, you’ll be walking side‑by‑side with a calm pup, and that’s the best reward.
FAQ
1. Why is a no‑pull harness better for a tiny pup than a collar?
Collars squeeze the neck and can cause pain, especially for short‑necked breeds like Chihuahuas. A no‑pull harness distributes pressure over the chest and shoulders, so when your dog pulls the force shifts sideways instead of straight back. That means less strain on the trachea and a smoother walk. Plus, the harness teaches the pup to walk beside you rather than sprinting ahead.
2. How do I know the harness is the right size for my small dog?
First measure the chest circumference just behind the front legs. Wrap a soft tape, keep it snug but not tight. Then compare the number with the harness’s size chart. Most models let you slide two fingers between the chest plate and the dog’s skin—if you can’t fit more than two fingers, it’s a snug fit. Adjust the belly strap so it’s loose enough to move but firm enough to stay in place.
3. What’s the best material for a no‑pull harness for a small dog that’s sensitive?
Breathable fabrics like mesh or cotton blends keep the skin cool and reduce sweat buildup. A neoprene or foam pad adds a soft cushion without adding bulk. Avoid heavy polyester or tight nylon webbing that can trap heat. If your pup has thin or delicate skin, look for hypoallergenic options and a smooth lining to prevent chafing during long walks.
4. Can I use a no‑pull harness on a small dog that already pulls hard?
Yes, but you’ll need a gradual transition. Start with a short trial walk in a quiet spot, rewarding each moment the dog keeps its head up. If it pulls, gently say “easy” and redirect, then give a treat. Over successive sessions, increase distance and add distractions. The harness will slowly teach the dog that pulling moves it off the front clip, so it learns to walk beside you.
5. What maintenance does a no‑pull harness for small dogs need?
After every walk, wipe the chest plate and straps with a damp cloth to remove sweat and dirt. Check for wear—look for frayed seams or broken buckles. Store the harness in a cool, dry place and avoid leaving it on the dog for extended periods. If you notice redness or new scratches after a few days, adjust the fit or try a different model. Keeping it clean and in good shape extends its life and your pup’s comfort.
6. Will a no‑pull harness interfere with my dog’s natural scent marking?
Most harnesses are designed with open fronts and breathable materials that don’t block the dog’s ability to spray or scent. The harness sits over the chest, leaving the flank and rear areas free. If you’re concerned, choose a model with a removable or adjustable chest plate so you can reposition it during a walk. This ensures your pup can still communicate with the world without feeling restricted.
7. What should I do if my dog resists putting on a new harness?
Turn the fitting into a game. Let the dog sniff the harness and reward curiosity with treats. Attach the leash first so the dog has a familiar anchor, then slip the harness on while you hold the front clip. If it’s still stubborn, try a softer material or a different style. Patience and positive reinforcement make the harness a friendly accessory, not a hurdle.
Conclusion
We’ve walked through the nitty‑gritty of fitting, training, and troubleshooting a no‑pull harness for small dogs, and you’re probably wondering if it’s all worth the effort.
First off, a properly fitted harness isn’t just a piece of gear—it’s a partnership between you and your pup.
When the chest plate sits flat, the front clip nudges rather than pulls, and the dog’s natural gait becomes more relaxed.
Here’s the quick take‑away: keep the two‑finger rule alive, adjust the belly strap before the chest, and switch rings if the dog starts leaning. A tiny tweak can stop that annoying tug‑tug cycle.
Still unsure? Test in the hallway, then on the sidewalk, and note any red lines. If you spot them after ten minutes, loosen the strap just a click. A clean, breathable material keeps skin happy and the leash feeling light.
What about training? Pair the harness with a calm cue—“easy” or “stop”—and reward the relaxed stance. Consistency beats intensity; five short walks a day outshine one long session.
So, what’s the next step? Treat the harness as a daily tool, check the fit every month, and remember that a little patience turns a tug‑tug battle into a walk you both enjoy.


